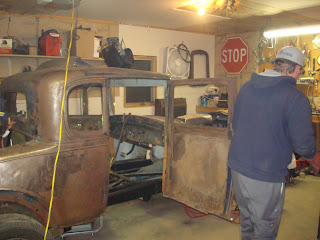
Monday, February 13, 2012

1949 Mercury Flathead Resurrection 1929 Willys Whippet

Once again this is what I started with, a 1949 Mercury 8CM Flathead.  It is a 255 cubic inch about 114 horse power from the factory.  We bought an old farm truck and parted it out and I kept the engine.

I tore it down to where the cam and rotating assembly were still in the block and started cleaning.  2 days of cleaning later it looked like the picture below, with some paint of course.  The water jackets are notorious for building up rust resulting in over heating, so I cut up coat hangers and put them in an electric drill.  I then would spin the hangers while pushing them in and out of the water jackets to loosen any scale that was built up.  It helped to have the engine on a stand so I could spin it upside down.  Then I would tap the block with a rubber hammer and pounds of junk would fall out.

I installed a pcv valve in the valley of the block to help with ring seal when the engine is running.

The engine probably should have been honed and re-ringed but if it isn't stuck it will probably run, so I took a chance and started putting it back together.

I picked up an older Edelbrock Super Dual Intake Manifold to run two Holley 94 carburetors.

These engines run two water pumps so I found the truck style through Napa online.  I already had my motor mounts built on the frame so I wanted to stick with what I had.  I got exhaust manifolds from a 1934 Ford Flathead because they work as a dual exhaust where the merc came with single exhaust.

I switched the block over to head studs instead of bolts because they seal better and are less likely to snap off.  Just make sure yoou get the correct year because they are different lengths.  I found a deal on the Hamb website and found out they were for a earlier year, they still work but the bottom row has a lot of thread showing.
I picked up some chrome wire looms and a spark plug wire kit from Speedway.  This was my first time making spark plug wires and it was actually pretty easy, getting them to slide through the looms was the hard part.


Friday, February 10, 2012

1931 Chevy 5 Window Coupe


This is a video we took the first time I ever drove the car.  It had a bit of a death wobble in the front end but I ironed that out later.  It was an amazing feeling driving something that I built from a truck that was buried in the dirt for about 50 years.


This is the Coupe right before we started sanding it for paint.  I took it out for a test run and the torque converter went out.  I took these pictures after it died.

I was trying to get this car ready for the Glendive car show and the converter went out about 3 days before the show.  So I pulled the engine and transmission, replaced the converter, installed the red lexan windows, sanded and painted the body and put the floor in in 3 days.  Needless to say I made it to the carshow.

Tara made the seat cover for me.


This is a 30's Pontiac dash

These are a couple of the pictures they used in the Rebel Rodz magazine that I had a 2 page layout in.

Wednesday, February 8, 2012

1929 Willy'sWhippet Model A Frame Construction Body

My original plan was to use this saginaw 3 speed transmission from a 57' Chevy with an Offy adapter that you can see in the picture. I would have then had to convert the rearend to an open driveline because it uses a torque tube from the factory. 

But I found a 1946 Ford 3 speed transmission for less than the cost of the open drive conversion kit and it makes it a bit more traditional in style.


The next group of pictures is the process of adding steel structure to the body and basically creating framing for the floor sheet metal to attach to.


I left the center open to allow travel of the torque tube under suspension compression.

I then framed a higher section to cover the open torque tube area.

There is one more stick to put in here but you get the idea.


Of course having the engine mocked up in place is essential to getting the rest of the car's proportion right.


Sunday, February 5, 2012

Val and Glasgow Mt, 1933 Ford 33' Plymouth

So yesterday I made the 3-1/2 hour trip to Glasgow Montana to get a 1934 Ford Frame for my new 33' Ford Pickup project.  My friend Jerry also lives there so it was a trip well worth the drive.  After I picked up the frame Jerry and I went on a hot rod  tour of Glasgow. 

We started at Jerry's where he showed me a picture of a car I was told about by my father when I was in high school.  I have been looking for this car ever since my dad told me about.  Needless to say I still haven't found it.  I was amazed to see that Jerry had a picture.

Larry Deal owned the car, that is Murk Mansel in the passenger seat.  This picture was taken in April of 1963.
Jerry has got a 70' Mustang Mach 1 that he bought new, it has 16,000 original miles on it.  The car looks brand new, it still has the original tires on it!  I'm kicking myself for not getting a picture of it, it's unbelievable.

Here is a couple pics of Jerry's 33' Ford coupe I just might sell parts of my body to obtain, he fits 5 vehicles in his garage so it was a little cramped.


We cruised around town saw a couple rat rod projects and the front engine dragster seen below.
It doesn't have the engine in it right now but, it ran a 292 straight six...crazy.
This is at the Malta 1/8th mile track.

Here is another 33' Plymouth that a guy in glasgow is building.
I also met this guy Stormer, he sells rc cars on the internet and drag races.  He has some cool stuff on youtube, but here is his drag car.  It's a 4 cylinder...crazy.


Friday, February 3, 2012

1931 Chevrolet 5 Window Coupe Body

I set the body up on the firewall, it is the easiest way to square it up.

Here I started adding steel structure to the inside of the body.  Old Chevy's had wood for the body framing.  They basically made a wood frame then wrapped it in metal.


Here is the body before I chopped the roof about 4 inches.

After the chop.

You can see here the fiberglass trunk lid I bought from Speedway Motors, then I made the panel above and below the lid.

Thursday, February 2, 2012

Oil Field, Bakken, Flare Pit, H2S Gas, Frac

The Arnegard State west of Watford City.

When it starts to whistle it's really pumping out.  You can hear it die down and rush back up.

A frac fill south of Watford, those are Key trucks, not ours.

This is our tank battery that we move from location to location for flow back after the frac.  The orange wind socks are for H2S gas if it is encountered.

Just a drilling rig north of Manning.

A location at dusk, I was waiting for a truck to show up.  Those are our frac tanks and tank battery.


At least the flag isn't red!

Rig just south of Killdeer

Wednesday, February 1, 2012

1929 Willy's Whippet, Ford Model A, Mercury Flathead,Frame Fabrication, Body Channelling, Pinion Angle, Firewall Reversal

Setting up the front suspension.  I am going to make what is called a "suicide perch" for the front axle.  If it were to fail the frame hits the ground, hence suicide.

Just a shot of how I connected the rear suspension and the rear frame section that I made.  The wheelbase is longer than a Model A and on a Model A the rear spring is directly above the rear axle.

I cut the frame horns off the Model A Frame and removed the front stock cross member, both items that easily get you a couple hundred bucks on ebay.  Money toward the project!


Here I set the pinion angle at +3 degrees for suspension compression under acceleration.
Here I have the body channelled 6 inches over the frame.

You can see the first part of the front spring perch welded on.  I later add bracing to it.

A closer view of the semi-finished suicide spring perch.  I made it tall to get the car low to the ground.

I removed the firewall to reverse it and give me the engine bay clearance I need.  Reversing is just flipping it around.

Here the firewall is reversed and welded in.  The hole in the side of the cowl is for the cowl steering which I will show later.  I cut the tops of the doors off, welded the doors shut, removed the windshield sun visor, and chopped the windshield frame about 3-1/2 inches.

I have the driver side door top folded over, you can see the original height on the passenger door waiting to be done.