Monday, January 30, 2012

Chevy Coupe Frame Fabrication and Painting, Suspension

Here I added some crossmember bracing, sometimes called x-members because of their shape. 

I then added some Ford Mustang springs and Speedway Motors spring mounts. 

Here the frame is upside down for painting.  You can see the 4 link mounts that I welded up.


Tara bought me the headers for Christmas.

I just like these two black and white photos.


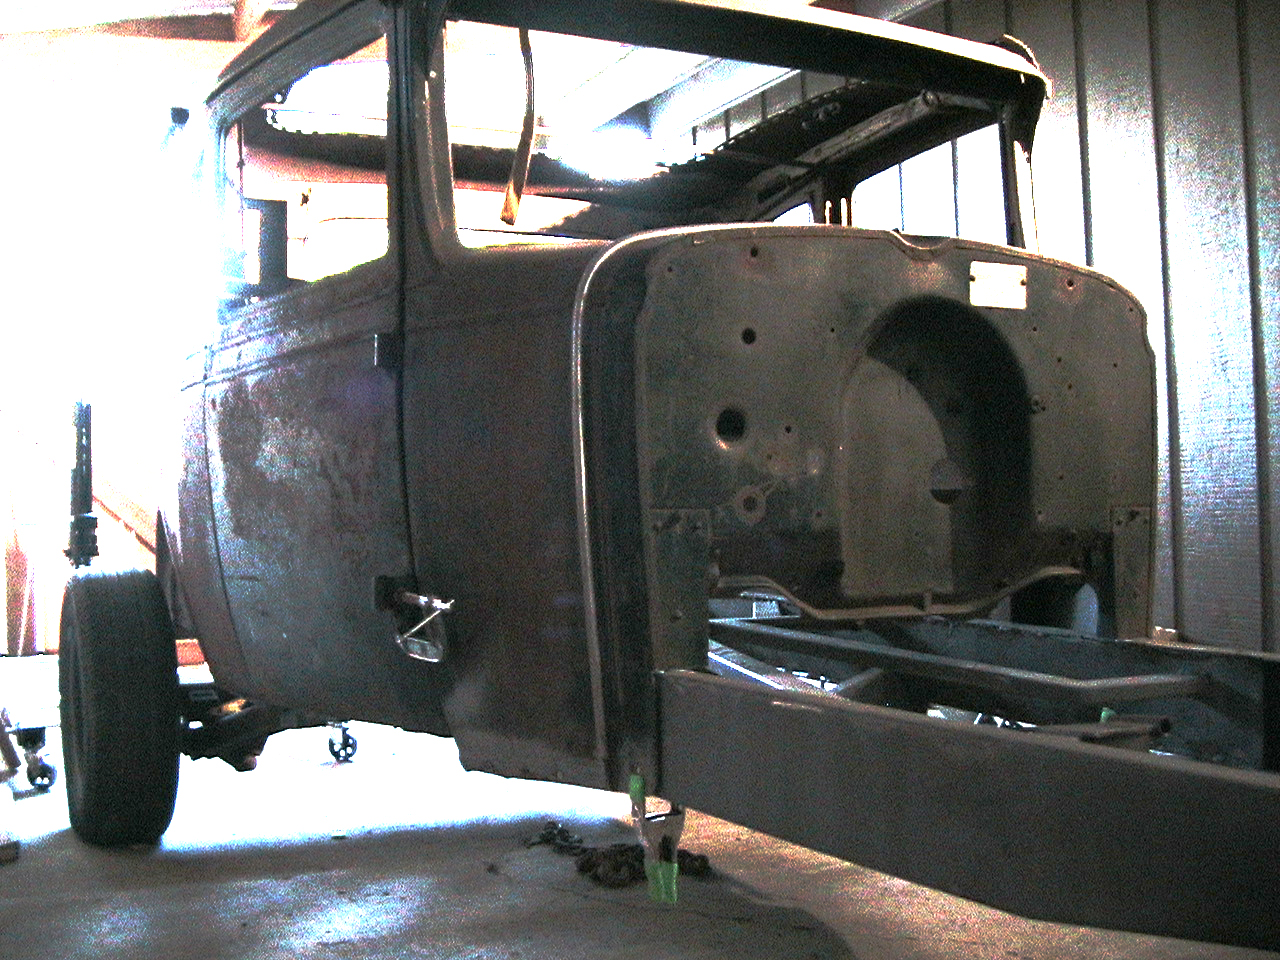
These last four are out of order but, they show the body channeled over the frame 6 inches and what it looked like before the channel job.


Unchanneled

Channeled
You can see why I said earlier I should have taken more out of the frame length, it looks funny.

1929 Willy's Whippet, Ford Model A, Hot Rod, Mercury Flathead

Started with a pretty bare Ford Model A Frame
I started this project about 3 years ago with the intention of taking parts I already had, putting them to together and making a rolling project that I could sell and make some coin off.

I made the rear section out of new 2x4 box tubing.  I stepped it up to get the car lower and extended it rearward to use a spring behind banjo rear differential.
I also needed something to occupy my mind that winter, so I rounded everything up and brought it to my garage in October 2009.

1949 Mercury 8CM Flathead
I had an old Ford farm truck that had this Mercury Flathead V8 in it and it still spun over so I yanked it out and started tearing it down.


1936-39 Ford Wide Five Wheels and Brake Drums

I used part of the Model A frame that I cut off to make a rear cross brace and then used c channel from another frame section to make this rear spring perch.

Here is the 1929 Whippet body as I bought it.  I sold it on ebay and I think the guy who bought it died and nobody came to pick it up.  It is a Sport Coupe, it used to have a leather top like a convertible.

Sunday, January 29, 2012

New Project, 1933-34 Ford, Pickup, Hot Rod

So I found this 1933 Ford 1.5 ton farm truck in a field next to a road that I used to get to a couple Hess Flowbacks.

Luckily, the owner had a "Posted" sign on the corner  of the property with his name and phone number.


I called the guy and we struck a deal on the price.


I think the flathead is probably no good, we'll see.

This thing is huge, it looked much smaller when it was sunk into the ground and the weeds.


I found this 1934 Ford frame on The Hamb, it's a website that is for old cars.  The frame is in Glasgow, MT.

This is why I am keeping this truck and building it, usually I would have flipped it and made a few hundred bucks.  When I saw what it could look like I was hooked like a crack addict.


This is a picture my sister Tiffany took after I got it unloaded at home.

1927 Chevrolet Frame Fabrication, Engine, Transmission Placement, 1931 Chevy Coupe Build, Pinion Angle

We cut a few inches off the rear and moved the crossmember forward
So my friend Josh came to Oregon to help me for a week.  He is a welder and would make sure the frame was done correctly.

The rearend was from a Caddilac limo and had this triangulated four link design already built in so it worked great.

Making the sparks fly!

We set the engine in place and the cowl to make sure everything was going to fit.

Here the Ford Model A front crossmember is installed to lower the front end.  You can see that the frame is fully boxed now too.  Always make your body mounts before boxing the frame, I failed to do that on this car.

The motor mounts and the transmission crossmember are installed.  I bought Model A to Chevy 350 motor mounts and modified them to fit the wider frame of a 27' Chevy.  I got a 40' Ford axle off ebay, some 39' Ford spindles off ebay then the rest of the frontend parts from Speedway Motors.


We made some upper shock mounts for the rear.

This is basically the progress Josh and I made for the week.  The transmission angle is -3 degrees and the rear differential pinion angle is +3 degrees so when the suspension compresses under acceleration the drive shaft is at 0 degrees.

Saturday, January 28, 2012

Oil Field, Work, Ford F150 Pickup, Hydraulic Fracturing, Flow Back

This is my second home, my mobile office.  It is a 2011 Ford F150 that Power Fuels bought for me.

This is Haliburton rigged up for a frac.  This was a Whiting well location.  You really need to see it in person to appreciate the magnitude of this operation.

This is a flowback temporary flare set up by Colter Energy.  Flowback is when they get the water, sand and oil that is in the hole back up to the surface after the Hydraulic Fracturing procedure is finished.

This is the same flare as in the above photo. 

This is a permanent flare pit at a Whiting well north of Belfield, ND.  It was the record holder for oil production in the state for awhile.

It was about 20 below zero this day, the sun made this "halo" in the air.  It's not just a camera effect.

Being on the road you see some crazy natural things.

Here is a competitors fresh water truck hauling "dirty" flowback fluid.  We have standards, a lot of other companies don't.

Coming home one night recently.

Sandblasting, Frame Preparation, Shortening the Frame


Here is the 27' Chevy frame back from the sandblaster.  I think it cost me about $200 to get it blasted.

Here I have the sections of the frame marked out to remove.  I later found that I should have taken about 7 more inches out so that the proportions of the car would look correct.  You live and learn.


I used a reciprocating saw and a grinder with a cut-off wheel to cut the sections out of the frame.  I step cut it so that I would have more surface to weld and the lower cut will support the upper cut.

I made sure to weld cross braces from side to side to make sure the width of the frame stayed the same.

Here the frame is welded back together.  What I learned later on is I should have welded gusset plates on the inside of the frame rails over the cut sections.  My thinking at the time was that when I boxed the frame that would give it enough support.  It ended up being fine but now I always gusset stress areas.